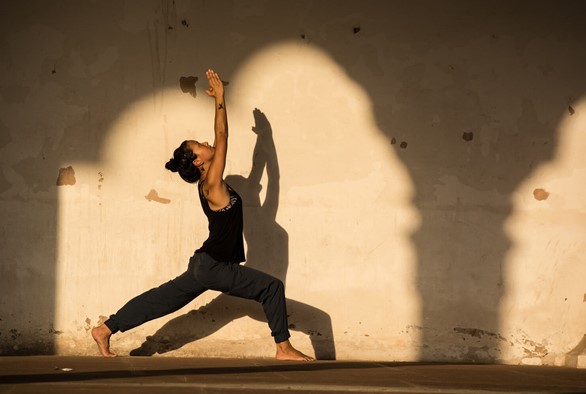
Ashtanga vinyasa is a carefully crafted and methodical sequence of postures that builds progressively in intensity. If you have ever wondered if there is a logic behind the progression of asana in the Ashtanga Primary Series, you are not alone. They are several key poses in the Ashtanga Primary Series that help you progress to the next posture and ultimately, the Intermediate Series.
If you look at the sequence as a whole, Ashtanga vinyasa is broken down into the categories of:
- Surya Namaskar.
- Standing Poses.
- Primary Series.
- Finishing Sequence.
Two of the poses we will look at come from the Standing Poses and Finishing Sequence, while the other two come from the Primary Series itself. The key postures of the Ashtanga Primary Series are Utthita Hasta Padangustasana (Extended Hand to Big Toe Pose), Marichyasana D (Marichi's Pose D or Sage Twist D), Supta Kurmasana (Sleeping Tortoise Pose), and Urdhva Dhanurasana (Upward Bow, also known as Wheel Pose).
Email Newsletter
Subscribe and get the stories about the greater change that comes from yoga.
The Importance of the Sequence
The Primary Series is known as Yoga Chikitsa, which translates to "yoga therapy" from Sanskrit. It is the sequence that helps the physical body and rids the body of disease. Following in line with much of yogic philosophy, the way in also begins with dealing with the external form first. You must understand your physical body first.
Many diseases in contemporary life are derived from the diet. Therefore, the postures in the primary series emphasize forward folds in order to compress the digestive organs and stretch the back of the spine.
Read: Ayurvedic General Principles of Diet and Digestion
Additionally, the primary series has an emphasis on the alignment of the primary curve of the spine, the thoracic spine. This is performed by keeping the rib cage tucked in while performing the various forward folding postures during the sequence. This is opposed to the stronger emphasis on the secondary curves of the cervical and lumbar in the intermediate series. It only makes sense to emphasize correct alignment of the primary curve first, since this is the first developed part of the spine we are born with.
Utthita Hasta Padangustasana
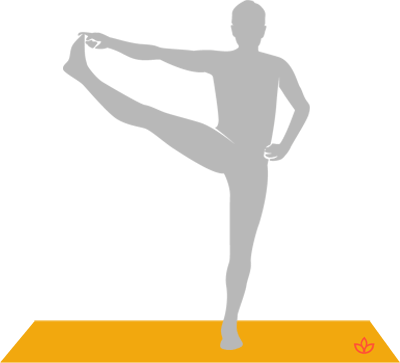
Standing postures are performed after surya namaskar) in order to stretch the legs. Utthita hasta padangustasana is a great example of this as a challenging balance posture. The sequence calls for 15 breaths throughout the duration of this short sequence, not including any transitions.
To perform the pose:
- Balance on one leg and catch the opposite big toe in your hand with the leg extended.
- Bow forward and touch your nose to the knee of the lifted leg.
- Hold for 5 breaths, then lift back up and open the leg out to the side.
- Look away from the foot and hold another 5 breaths.
- Then, bring the leg back to the center and fold over one more time as you exhale.
- Come up immediately on the next inhale and release the big toe while the leg stays lifted in the air.
- Continue to hold the leg up for 5 more breaths before releasing to samasthiti (tadasana or mountain pose) on an exhale.
- Repeat on the other side.
It is a pivotal pose, and rightly so. First, one must be able to hold the balance for an extended period of time. This displays not only the strength of the body but also the mind. With the leg completely extended, adequate hamstring flexibility is achieved.
It is also important to maintain and engage the bandhas, drishti, and ujjayi breath during this sequence, otherwise, all the benefits will be lost.
Read: Tristhana: The Three Elements of Ashtanga Yoga
Marichyasana D
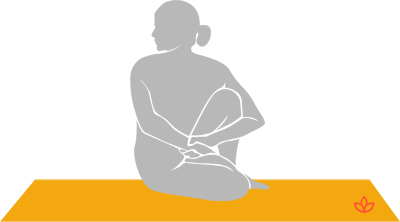
Things start to get a little more complex with Marichyasana D, the culmination of a series of binds and twisting postures. The seated postures of the primary series focus on the spine. Marichyasana D is a very deep twist with one leg in ardha padmasana(half-lotus pose) and the other is internally rotated in a half-squat position. You then twist in toward the leg in the half-squat and bind your arms around the leg.
To perform the pose:
- Begin with the legs outstretched.
- Bend the right leg and place it in half lotus.
- Bend the left leg and place the foot flat on the floor near the left buttocks.
- Exhale and twist to the left. Wrap the right arm around and behind the left leg. Reach the left arm behind and grab hold of the wrist.
- Gaze to the left.
- Breathe while holding the pose.
- Inhale and untwist. Change sides.
This pose can be quite complicated and is best to ease into it under the guidance of an experienced teacher. Those with knee injuries may need to take caution or modify completely. However, it is important to master this posture if you wish to proceed into the second series. The reason for this is because the second series begins with pasasana, a crouched position where you twist and bind around both legs.
Marichyasana D prepares you for the more difficult pasasana by bringing one leg into half-lotus. What this does is create a sort of blockage that you must work your way around, (or twist around rather) because when you move onto the second series, the space to twist will be even greater.
Twisting is obviously an important component of Ashtanga vinyasa in general and it’s said that twisting to the right stimulates the descending colon of elimination. Additionally, with the feet in the half-lotus position, their positioning stimulates the liver and spleen respectively for an additional cleansing effect.
Read: Why We Twist in Yoga: The Benefits of This Simple Action
Supta Kurmasana
For some, this posture may take many years to master. Supta Kurmasana is performed by folding forward with the legs over the head and the hands bound behind the back. This is the pinnacle of the primary series in which the hip opening and twisting of the previous postures in sequential order have prepared the body.
To perform this pose:
- Start by sitting on the floor with the knees bent.
- One leg is lifted and the elbow on that side reaches through.
- The lifted leg is then hoisted over the shoulder.
- The head is tucked under the foot while nudging the shoulder deeper into the knee crease.
- These steps are repeated with the other leg and the ankles are hooked on top of one another behind the head.
- The body bends forward until the head is resting on the floor.
- Arms reach around and back so that the hands clasp together.
This pose is important because it is most practitioner’s introduction to leg-behind-the-head poses. During second series, there are three such poses that are progressively more challenging. Being able to maneuver into supta kurmasana, with or without the help of your teacher, is a good indication that the hips and spine are ready for the intermediate series.
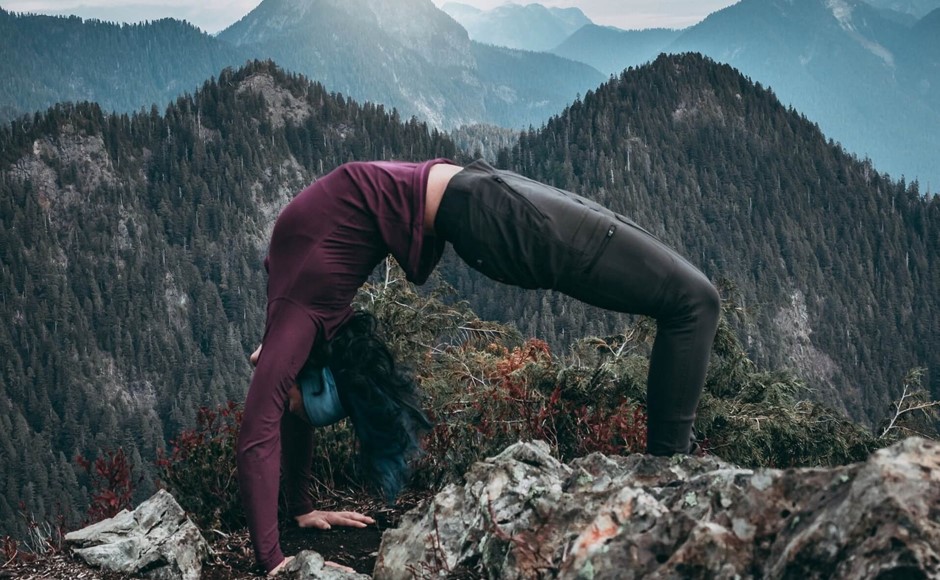
Urdhva Dhanurasana
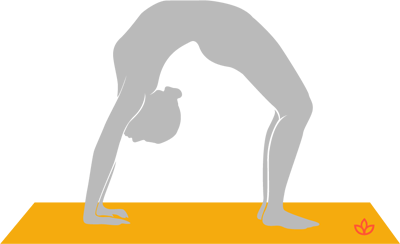
Finally, we get to the backbending to finish the Ashtanga sequence. Backbending is essential at the end, no matter what sequence you perform. Even though the majority of primary series is forward folds, the final pose is setu bandhasana (bridge pose), which prepares the body for backbending and gives a tease of what to come in second series.
To perform this pose:
- Lie on your back and bend your knees so that your feet are flat on the floor near your bottom.
- Inhale and reach your arms up. Bend your elbows and place your hands on either side of your head.
- Push into your hands, lift your hips, and gently rest on the top of your head with an inhale.
- Straighten your arms and lift your navel toward the sky with an exhale.
- Breathe while holding the pose.
Backbending is unique in that it is both extension of the spine combined with an inversion at the same time. It activates the primary curve in the opposite direction, so it helps to balance all of the forward bends. It is important to master urdhva dhanurasana in order to know how to engage the back muscles properly and avoid injuries.
Read: Yoga Can't Cure Back Pain!
In the beginning, most people will practice wheel pose from the ground. However, eventually, you can begin to practice what’s called “dropbacks”, where you go from standing to wheel pose and then back up. This is another stepping stone in order to know one is ready for the more advanced backbending in the second series, such as laghu vajrasana and kapotasana.
Tying It All Together
The way the Ashtanga sequence works is that each pose and also the section of postures need to be mastered before moving onto the next. This allows the next pose to be more easeful rather than so challenging. Without meeting necessary requirements, you may find yourself up against a wall in your practice, which can present frustration when trying to progress in your practice.
Even regular Ashtanga practitioners are advised to go back to the basics of the primary series when something more advanced is not coming. Sometimes it may seem like a step backward, but it will only help you move forward in the end.
During These Times of Stress and Uncertainty Your Doshas May Be Unbalanced.
To help you bring attention to your doshas and to identify what your predominant dosha is, we created the following quiz.
Try not to stress over every question, but simply answer based off your intuition. After all, you know yourself better than anyone else.